
Know Your Camera
A crucial part of DSLR photography is knowing how your camera works and where the different menus, settings, and functions are so that you can adjust them efficiently and correctly based on what you are shooting. This page will hopefully give you the information you need to allow you to change settings quicker mid-shoot, and help you and your potential models feel more comfortable.
My examples on this site will be referencing the Canon EOS 5D Mark III/IV, the Canon EOS R, or the Canon 80D because they are the models I prefer to use. Here you’ll find tips on starting a shoot, different modes that will help with your focus on different styles, and other settings to consider.
If you have questions about certain settings or modes, please send me questions or feedback in the form on my home page here.
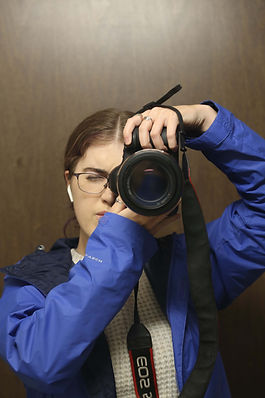
Before You Start
There are some basic tips that you should follow when using a professional camera. It is best to do these before you start shooting.
-
Always keep the neck strap on and keep your left hand under the camera and your elbows near your sides to support the camera and avoid camera shaking showing up in your photos.
-
Check that your battery is charged and the correct SD card is inside.
-
Format (clear) the SD card so you have room for your new photos. Formatting the card deletes all files on the card and clears other material that could corrupt the card. ONLY do this if you have backed up your SD card contents. Always have photos in at least two locations - computer, hard drive, cloud file, etc. No matter if it’s a set of photos for a project or just a hobby, you want them backed up in multiple places so you don’t lose them.
-
Check that your lens is on autofocus.
-
For beginners, set your file type/size to JPEG. Professionals tend to use RAW, but they are much larger files and require more editing and post-production work. JPEG is ideal for beginners because it is faster to share and ideal for taking up less storage space on SD cards, external drives, and computers.
-
Don't delete images during a shoot. It can corrupt the card (and interrupt the creative process).
-
Lastly, when starting a photoshoot of any nature, it's best to set your ISO first based on your environment, then adjust aperture and shutter speed afterwards.
Mastering Modes
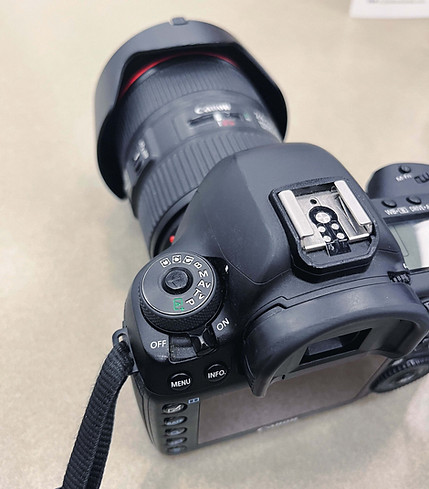

There are lots of modes you can use to achieve your goals when you shoot. The modes dial can be located on either side of the camera. In the photo here, the Canon EOS 5D Mark IV has the dial on the upper left side.
First, there is Aperture Priority (which you will see as AV on the modes dial). It allows you to set the aperture and ISO, and the shutter speed will follow automatically to give your photo a correct exposure. Notice in the second photo how the box for shutter speed is blank, since it will be automatically determined when you press the shutter button. This is a great mode to use when you want to take portraits and/or keep the depth of field at a certain level and not change it.
If you are a beginner, using Aperture Priority (AV) mode will help you to learn the relationship of the three elements of exposure, before attempting manual mode, which requires you to set all three.
Within AV mode, you can use something called the Exposure Compensation meter, which is typically a small dial on the camera or is accessible on the quick (Q) menu screen. On the image here, you can see the meter under the AV label on the screen. By moving the meter up or down, you can make very small adjustments to the shutter speed to slightly change the exposure. It gives you a bit of control over the shutter speed even when in AV mode, and helps make your image slightly darker or lighter as needed.
The next mode to try is Shutter Priority (marked as S or TV depending on the camera model). This mode is similar to Aperture Priority, but it locks the shutter speed and adjusts the aperture and ISO accordingly. This is ideal for sports photography or taking photos of something moving very quickly, and for reducing camera shake. It helps you to freeze the motion and make the image sharp and detailed, while the camera manages the rest of the exposure for you.
Setting Up For Success
There are many other settings that can be customized and adjusted to get the right look in your photo.
One setting to keep in mind is the lighting of your image while you’re shooting. In some cases, such as an outdoor shoot, the color of skin or other features will change. For example, if you are doing a portrait in the shade, light skin might have a gray-blue tint to it in the final image. To avoid this, you can adjust the White Balance setting on your camera. For the portrait example, the Cloudy option will add warmth to the skin. A good option is to use the Auto white balance setting, but sometimes selecting a more specific one can be helpful.
Pro tip: It’s always better to actively correct more settings in the camera during a shoot than to have to do more in post-production with color correction. You’ll get better at quickly changing these settings, the more you practice.
Stay tuned for more tips!